
Receiving the Device
Upon receipt of your device, please inspect it for any damage. If you find any issues, contact your hardware provider immediately.
Step 1. Installation and Environment
Location:
Install the fanless device in a well-ventilated area with an airflow of at least 0.5 m/s. Preferably, place it in an air-conditioned environment.
Warning:
The device's shroud functions as a heatsink and can become extremely hot during operation. Avoid touching it to prevent burns. Ensure the device is installed in a location where it cannot be accidentally touched.
Physical Installation:
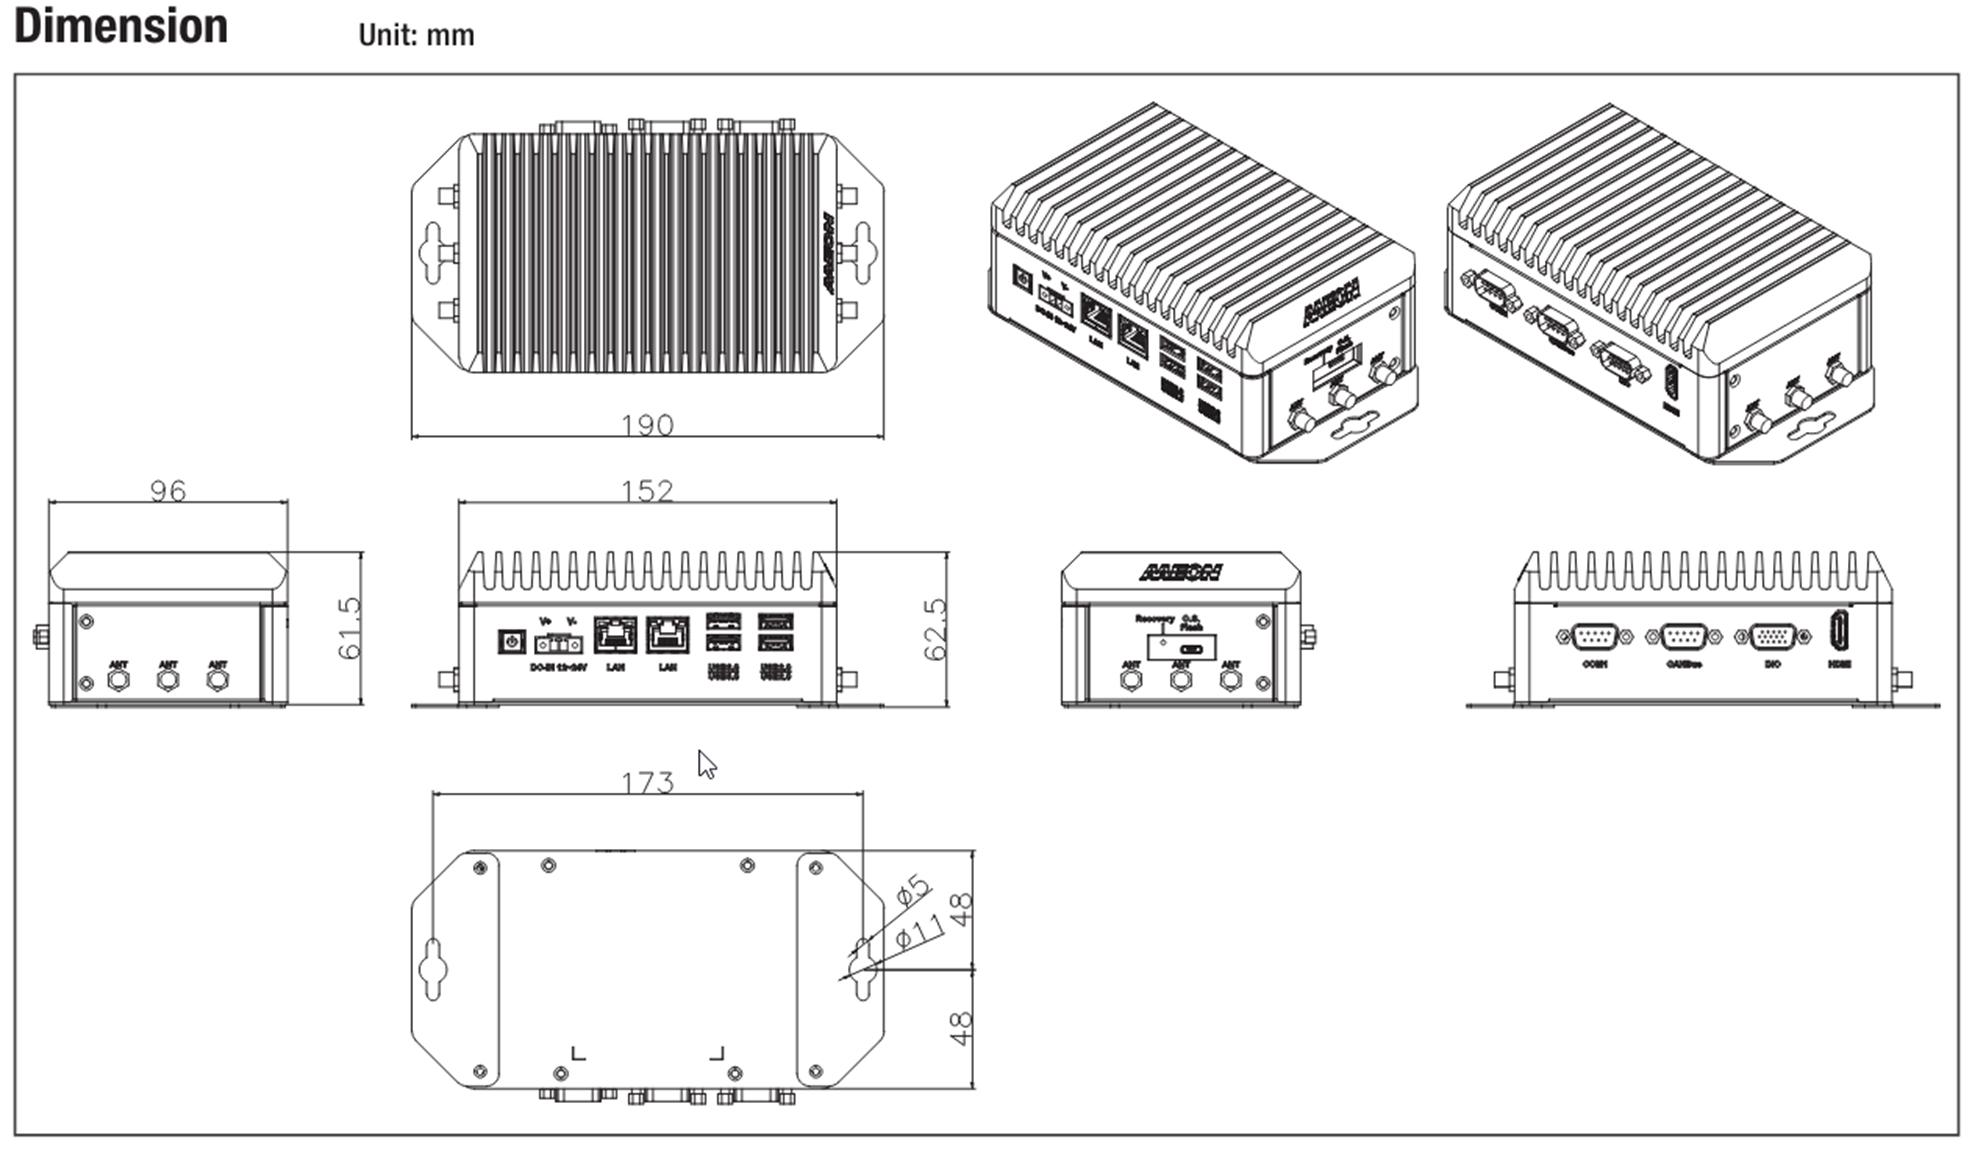
The device comes with mounting points and should be securely attached to a flat surface. Refer to the provided dimensions for the Jeston Orin NX device.
Step 2: Connectivity
Power Supply:
The device requires a standard DC-in power supply of 12-24V with a 2-pin terminal block. A compatible power adaptor, which can be plugged into a socket, is usually provided with the device.
Networking:
The device requires two open ports for basic operation:
Device to AWS (Mandatory)
Device to RTSP Cameras (Mandatory)
ONVIF Discovery (Optional)
Webhook Alerting (Optional)
Port Configuration:
From | To | Port(s) | Additional Details |
Device | AWS (Greengrass) | 443 or 8443 | |
Device | RTSP cameras | 554 (default) or other port | Recommended streams FHD 15FPS |
Device | Onvif Discovery cameras | 80 / 8080HTTPS 443 |
|
Device | Webhook | 80 and 443 |
|
Some devices are equipped with two separate LAN ports, allowing you to separate the internal camera network from external communications to AWS and webhooks.
Step 3: Protect Cloud
When you receive your Protect device, it is pre-registered to communicate with the Protect Cloud. However, to begin using it, you need to connect (Provision) it to your account. This provision process links the specific hardware to your user account, validates the hardware health, and installs the necessary software updates.
Navigate to the Devices Page Log in to your Protect portal and click on the Devices tab in the main navigation.
Open the Add Device Wizard by clicking the “+ Add Device” button

Enter Device Details The popup will ask for two pieces of information:
Device Name: Enter a unique name for this device.
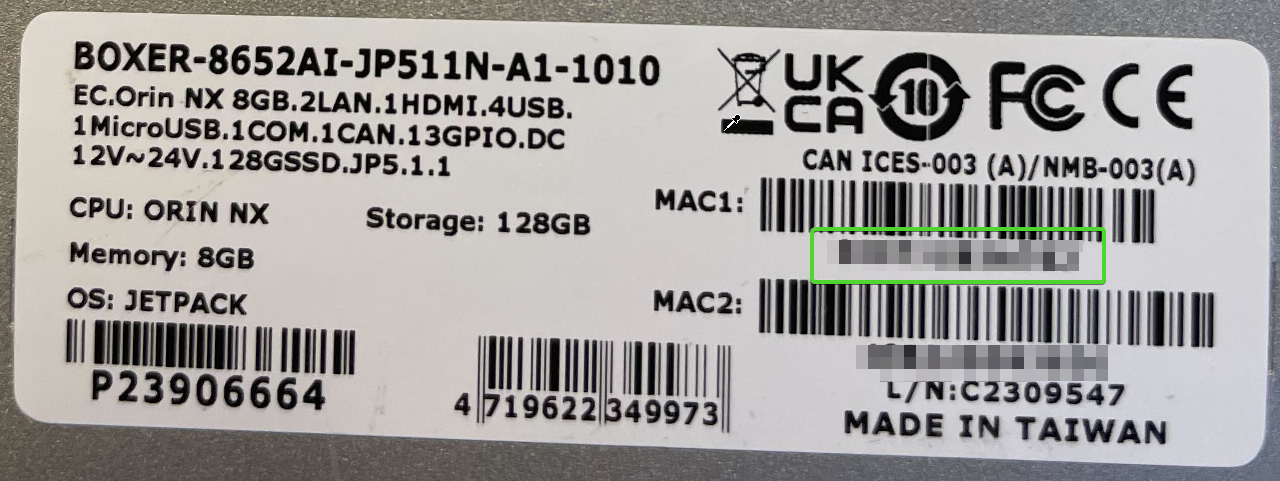
Hardware ID: Locate the sticker on the bottom of your Jetson device. Enter the first MAC ID found on the label.
Note: The name must be unique to your account and cannot exceed 150 characters.

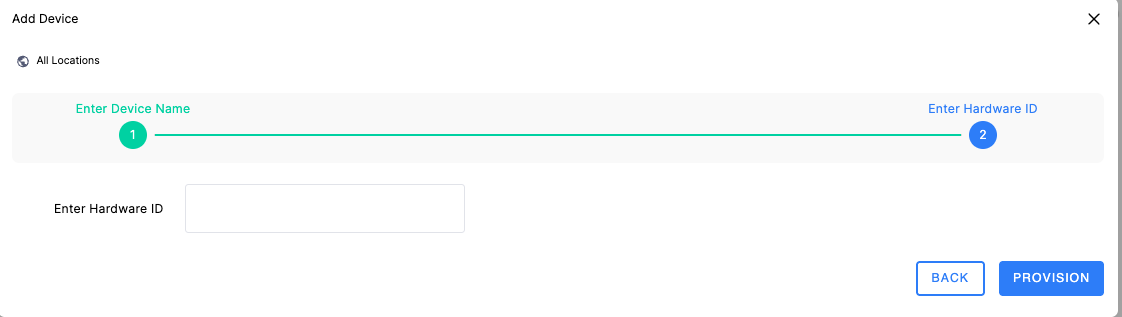
Click the Provision button.
Wait for Pre-flight Checks
Once you click "Provision," a loading spinner will appear. Do not close the window.
The system is currently performing automatic "Pre-flight Checks" to verify:
Device availability.
Hardware validity.
Software compatibility.
If successful: The popup will close automatically, and the device will appear in your list.
If failed: An error message will appear - refer to the table below for solutions.
Pre-flight Error Guide
Error
Cause
Resolution
"Field is required"
You left the Name or ID field empty.
Fill in the missing information.
"Device name already exists"
You used a name already assigned to another device.
Choose a different, unique name.
"The device ID is already registered"
This Hardware ID is already active on your account.
Check if the device is already in your list under a different name.
"The provided device ID is not valid"
The ID entered does not match our records.
Double-check the label for typos. Ensure you are using the first MAC ID.
"Device unavailable check the connection"
The device has no heartbeat.
Ensure the device is plugged in and connected to the network.
"Failed To Start Provision"
The device didn't succeed in re-provisioning
Contact support
Once the device is added to the table, it will begin downloading updates and configuring itself till the process is done.
Timeframe: Depending on your internet bandwidth, this process typically takes between 30 minutes and a few hours.
Status Indication: During this time, the Status column will show "Provisioning".
Important: While a device is in the "Provisioning" state, you cannot remove or edit it to prevent data corruption.


Handling Provisioning Failures
If the process is interrupted after the popup closes, the status will change to one of the following:
Provision Unavailable
Meaning: The device lost internet connection during the setup.
Action: Check your internet cables/Wi-Fi and click Reprovision.
Provisioning Failed
Meaning: A system error occurred (e.g., a package download failed).
Action: Click Reprovision. If the issue persists, please contact Support.
Operational Device States
Once provisioned, devices will be in one of these three states:
Unavailable – The device is not communicating with Protect Cloud.
Unhealthy – The device is communicating with Protect but is updating or has an issue.
Healthy – The device is communicating with Protect and all services are operational.
Upon powering on your device and establishing connectivity to Protect, you will see the device state update accordingly. Upon initial startup, the device may stay in an unhealthy state for some time (according to the network connection) whilst it updates.