
Remote Access
The Remote Access setting allows you to grant temporary system and data access to the support team for troubleshooting and maintenance purposes.
Allow Temporary Remote Access for the Support Team
Description: This feature enables the Support team to log in to your customer portal and access the remote edge device for support purposes.
Configuration:
Navigate to the Remote Access section on the System Settings page.
Click Grant Access to initiate the process.
Select the desired time period for which access will be granted.
Confirm the selection to authorize access.
When "granting access" the system will show how long the user has been granted access for and when that access expires.
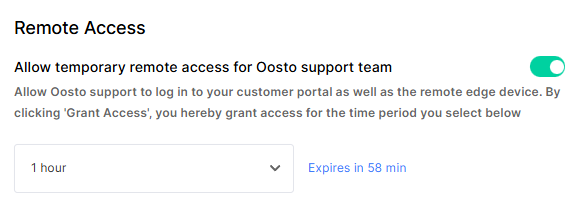
You can allow support access for either 1 hour, 1 day, 7 days or indefinitely, when granting this access a user called support supportagent@oosto.com will be added to your user management.
Note: By clicking Grant Access, you explicitly permit the support team to access your system for the specified duration. Ensure this aligns with your organization’s security policies.
Submit False Alerts
The Submit False Alerts settings control how identified false alerts are handled and whether they are submitted to protect research for system improvement.
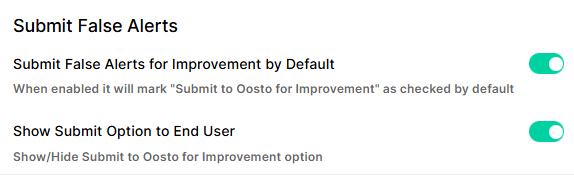
Submitting False Alerts for Improvement by Default
Description: When enabled, this setting automatically checks the Submit for Improvement option for all false alerts, streamlining the process of contributing to system enhancements.
Configuration:
Locate the Submit False Alerts for Improvement by Default option.
Toggle the setting to Enabled to mark Submit for Improvement as checked by default for false alerts.
Toggle to Disabled to require manual selection for each false alert.
Note: Review your privacy policies before enabling.
Show Submit Option to End User
Description: This setting determines whether the Submit for Improvement option is visible to end users when reviewing alerts.
Configuration:
Find the Show/Hide Submit for Improvement option.
Set to Show to display the option to end users.
Set to Hide to conceal the option from end users, restricting submission control to administrators.
Note: Hiding the option ensures the administrator's setting above is applied without any user interaction or ability to change it.
Alerts Retention
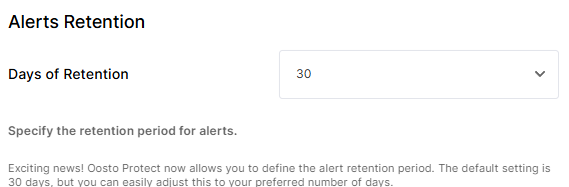
The Alerts Retention setting allows you to define how long alerts are stored in the system. The system has now expanded the default 30 days to be configurable, dependant upon the service plan you are on.
Days of Retention
Description: Specify the number of days alerts are retained before being automatically deleted. The default retention period is 30 days.
Configuration:
Navigate to the Alerts Retention section.
Enter the desired number of days in the Days of Retention field (e.g., 30).
Save the changes to apply the new retention period.
The system has options for 7, 30, 60 or 90, depending on your service plan.
Audit Logs Level
The Audit Logs Level setting allows you to configure the granularity of audit logging for system activities.
Select Audit Logs Level
Description: Choose the level of detail for audit logs to balance monitoring needs with storage efficiency. The default level is Maximum.
Options:
Basic Level: Includes actions such as View media, Create, Update, Export, and Security.
Detailed Level: Includes all Basic Level actions plus Filtering actions.
Maximum Level: Includes all Detailed Level actions plus Ordering, Copy Info, and Change View actions.
Configuration:
Locate the Audit Logs Level section.
Select the desired level (Basic, Detailed, or Maximum) from the dropdown menu.
Save the changes to apply the selected audit log level.
Note: Higher log levels provide more detailed tracking but may increase storage requirements. Choose a level that aligns with your auditing and compliance needs.